Contents
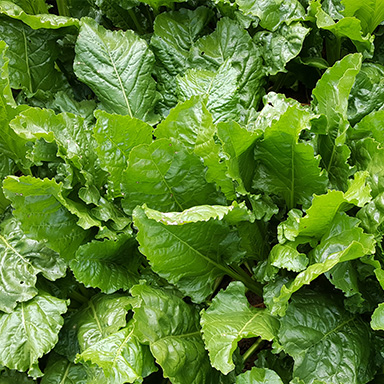
unbeetable
understand the beet types
plan and get the best results
picking the right beet
paddock planning
paddock preparation
paddock planting
paddock sowing rate
beet specific chemical applications
post establishment fertiliser applications
post establishment plant health
manage bolters
main points summary
unbeetable
RAGT is the company that rewrote the rule book and reintroduced beet into the New Zealand farming system.
Supported by our retail partners, our specialised beet systems are paying dividends for farmers all over New Zealand. We’re pushing the boundaries of traditional use and the full potential of this exciting crop is finally being realised.
Compared to any other typical feed source, beet’s cost, quality, utilisation and flexibility are hard to ignore, ensuring it can be included in most farming operations.
But that’s just part of the story. At RAGT, we know it’s what goes before and after sowing that makes a sustainable difference to a farming operation’s productivity and profitability. So look beyond seed and discover the RAGT beet difference.
Understand the
beet types
Environment, animal and end use should all be considerations when planning for your beet crop. This will help determine the beet type and crop area required.
The specific end use of beet will help determine the beet category and therefore variety selection. There are four beet categories within the species ‘Beta vulgaris’ and each type is typically suited to a key end use:
Mangel beet
- Dry matter less than 13%.
- Highest utilisation/highest proportion of bulb above ground.
- Variable plant size.
- Suited to in‐situ grazing, especially for young stock and self‐harvest.
Low-Medium DM% fodder beet
- Dry matter typically between 13‐17%.
- Variation between types and proportion of bulb above ground.
- Variable plant size.
- Suited to in‐situ grazing with some being suitable for self‐harvest.
Medium-High DM% fodder beet
- Dry matter typically between 17‐20%.
- Variation between types and proportion of bulb above ground.
- Variable plant size.
- Suited to in‐situ grazing by older animals with some suitable for self/ mechanical harvest.
Sugar beet
- Dry matter 20%+.
- Uniform plant size.
- Suited to mechanical harvesting with longest storage potential.
| Mangel beet* | Fodder beet | Sugar beet |
|---|---|---|
|
Very low DM% (less than 13% DM) |
Medium-High DM% (typically 17-20% DM) |
Very high DM% (up to 26%) |
| BRIGADIER™ | MINOTAURE | SUGA™ |
| 1505Bv | ||
*“The basic distinction between mangels and fodder beet is one of dry matter content, in general varieties with less than 13 percent dry matter are called mangels and those over this value fodder beet.” Irish Journal of Agriculture
Plan and get the
best results
End use
Determine what stock class the feed is for and their specific feed requirements. Consider if the crop will be a grazed in-situ proposition with the option to self-harvest or a full mechanical harvested option. Consider what the crop is required for: maintenance feed vs. animal production (liveweight gain or milk production) – this should help determine the beet type, together with the supplement type, quantity and quality required.
The duration of feeding will help determine the amount of feed required to be sown (dependent on the aim and animal requirements). Factor in the transition period of feeding (14-21 days for cattle) and that there is sufficient feed available in environments where adverse weather conditions are a risk.
Environment
Once the end use is determined, consider the environmental implications of the planned crop. Ensure the paddock and soil type are suitable for any cropping plans together with the determined end use, especially if the crop will be grazed in-situ. Ensure any waterways are excluded from cropping and grazing plans if applicable.
Consult with your respective regional authority and adhere to their specifiic guidelines.
picking the right beet
If you’re looking for one of the most cost-effective and consistent feed sources, RAGT beet really is unbeetable. Combining high energy with high yields and high utilisation, it ticks all the boxes for feeding systems in New Zealand. Consider the benefits and discuss your requirements with RAGT to see how beet can fit your system.
RAGT beet system
grazing
| Full portfolio of proprietary hybrid grazing beet types | |
| Most experienced team of beet specialists | |
| High consistent yields from all RAGT grazing beet types | |
| Use RAGT beet to fit your feed requirements across seasons | |
| High energy 12 MJME/kgDM | |
| High utilisation in all systems | |
| One of the lowest cost/ high energy feeds able to be incorporated into your system | |
| Increase your production and profitability with RAGT grazing beet systems | |
| RAGT grazing beet systems for all stock types |
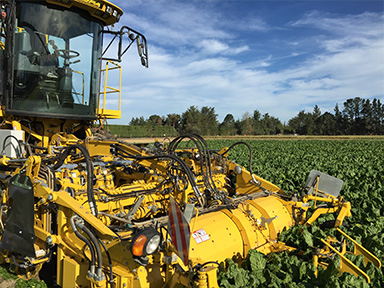
RAGT beet system
harvesting
| Ability to store longer due to higher DM% | |
| Can be fed whole or chopped depending on your system | |
| High harvested bulb yields possible due to very high DM% | |
| Bred for mechanical harvesting – uniform plant size and crown height | |
| Perfect spring grass balancer – high energy 12 MJME/kgDM, low protein bulbs | |
| High utilisation (95+%) in all systems | |
| Grow on farm or buy in to suit your system | |
| Perfect for dairy and beef systems | |
| Can be left in the paddock to harvest when needed until spring |
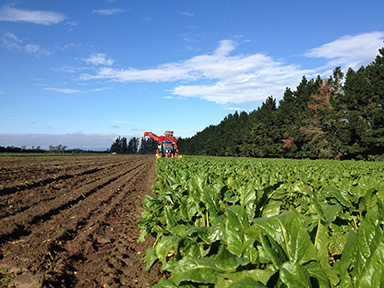
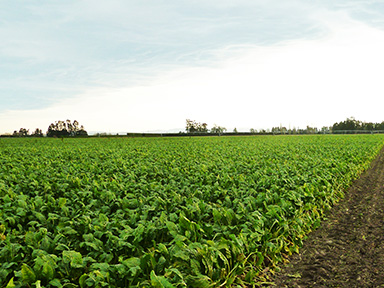
Thorough planning and correct paddock preparation will achieve best results
Up to two thirds of the total crop yield will be determined by the activities carried out before seedling emergence. Following these key steps and ensuring the seedbed is in optimum condition will help ensure that high yields are achievable.
Paddock
planning
Select paddocks that will be suitable for beet with known history, optimum nutrient availability and can be prepared to an acceptable standard.
When considering fodder beet in your rotation, do not choose the worst paddock on the farm or use the species to ‘break in ground’. It should follow a thorough rotation with emphasis given to nutrient status. Fodder beet prefers a light to medium free draining soil, but it can thrive on a range of soil types if they are reasonably well drained and not acidic.
Ideally identify paddocks a year in advance, aim for a pH of 6.2 at planting and determine availability of other key nutrients. Consider paddock suitability for beet: environmentally, soil type, practicality. Lime should be applied as soon as possible if there is a pH deficiency, magnesium application can be applied at the same time.
As fodder beet is a specialist crop, ensure you have planned for the crop well in advance. If including fodder beet in a cropping rotation on your farm, ensure paddock history is known before planting as seedling beet can be susceptible to residual chemicals.
- If following a brassica, avoid any paddocks with a history of residual post emergence herbicides that have been applied the previous season to the crop. Seek specialist advice.
- If following a brassica, it is best if the crop has had no post emergence herbicides that will be detrimental to beet.
- If growing a herbicide tolerant brassica and using sulfonyl urea chemicals you will not be able to follow with fodder beet.
- If following a cereal, avoid paddocks that have had a history of chlorsulfuron.
- If following a maize crop, avoid paddocks that have a history of atrazine and mesotrione.
If these chemicals have been used and fodder beet is planted, the plants will often emerge slower and be discoloured (red/brown instead of bright green) and disfigured (curling/crinkling of leaves) and crop yield reduction will result.
Never double crop fodder beet as this will result in significant problems regarding specific beet issues such as weed beet, pests, root and leaf diseases and soil consolidation.
Always use another species as a break crop and allow 3-5 years between beet crops.
Paddock
preparation
Two thirds of the total crop yield will be determined by the activities carried out before seedling emergence.
Each soil type and climate will have specific guidelines regarding paddock preparation. Knock down sprays are crucial to helping remove as many weeds as possible prior to the crop being planted. Add an insecticide if there is a population of insect pests present and always add an organo-silicone penetrant to aid in knock down. Do not combine tribenuron methyl or thifensulfuron methyl with your knock down glyphosate as this will affect seedling emergence and can damage seedling plants.
- A well-prepared seedbed is essential to establish the crop as evenly and as quickly as possible. In most areas a period of moisture build-up will be required to conserve moisture (fallow period). Whether achieved via sufficient fallow period or by irrigation.
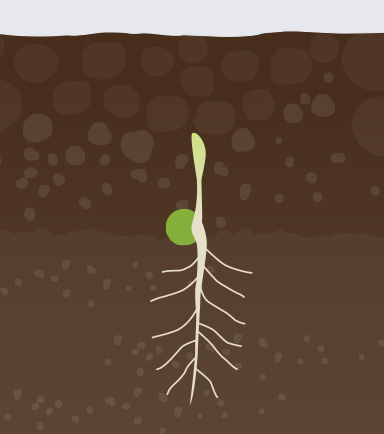
First cultivations
Ensure there are no sub soil restrictions that could obstruct plant root development.
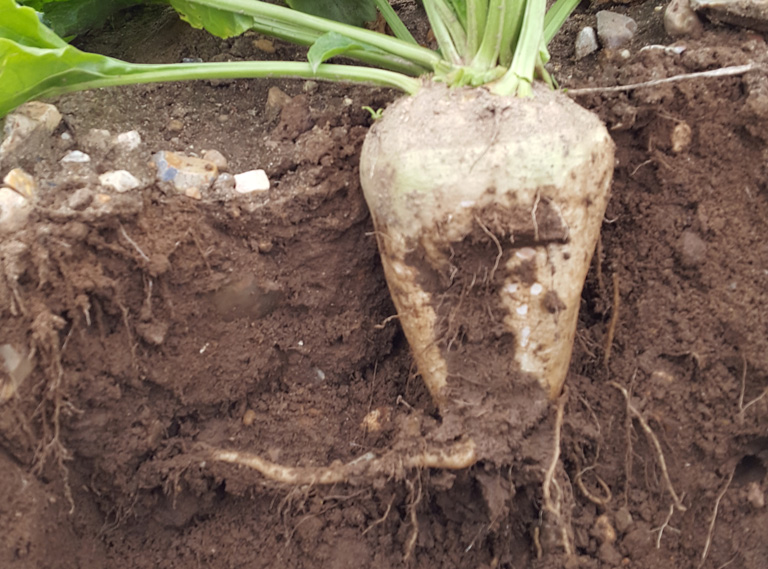
- Ensure no root restrictions are present in paddock, as the roots of beet can go down to 1.5m with no obstructions, which enables access to moisture at depth.
- Dig soil inspection pit to determine if any pans are present, and if so to determine their depth for shattering by subsoiling (images 1-3).
- Beet is very sensitive to poor soil structure. Poor seedbed conditions can lead to significant yield reduction due to a range of factors such as: poor seedling establishment, soil compaction and reduced moisture availability.
- Soil compaction layers in the soil profile can significantly restrict root depth leading to increased plant vulnerability to dry conditions.
Inhibited root development caused by subsoil pan.
Crop result of subsoil pan.
Comparable crop with no root restrictions.
Subsoiling (if required)
After spraying out, use a subsoiler/ripper (leaving wet soil at depth) set to a depth of 50mm maximum below any pans.
Main cultivation
An adequate fallow period allows moisture build up and an early weed strike.
- Should be carried out well in advance of planting to allow soil weathering and a weed flush (fallow period).
- Apply base fertiliser after main cultivation.
- Aim for a level finish, be patient for correct conditions to allow working. Consolidate workings within a few days to help minimise moisture loss.
Leaf Area Index
A rapidly growing canopy with good ground cover can exploit sunshine hours to help drive yield.
- To ensure full sunlight capture, a leaf area index of 3 is required to intercept 90% of the available light. This leaf area index is determined by the leaf area per m². Almost complete ground cover (90%+) typically corresponds to an LAI of 3.
Base fertiliser
Ensure key nutrients are not limiting for optimum plant emergence and subsequent growth.
Application will be based from soil test and supplying key elements for optimum plant establishment and growth.
Timing should be at least one week prior to plant to help avoid burn of the emerging seedlings (if application is to be closer; then split the application by half, with the remainder applied post planting).
This application should include one third of applied nitrogen (N) requirement, together with the crop requirements for other key elements and will be incorporated with the final surface workings.
Base nutrients
> Lime and pH
Lime is required to correct soil pH to optimum levels (6.2) to help maximise yield of beet. Low pH limits the availability of essential nutrients (which will depress yield potential). Choose a fine product that will correct pH more rapidly and avoid coarse, hard materials as particles
- 1.3mm may offer limited value. If pH is not optimal, consider postponing planting this paddock for another year to allow time to correct deficiency.
> Nitrogen
Nitrogen (N) is a major component of the proteins that drive optimum plant growth. It is an essential factor for the rapid growth and development of the leaf canopy required and the capture of solar radiation which is essential during the early stages of beet growth.
Beet requires a total of 220-250 kg N/ha to obtain its maximum yield (some of this will be supplied by soil available N and the balance by applied N). A leaf area index of three is required to fully cover the soil and maximise radiation interception. The beet leaf requires 30-40 kg N/ha to produce each unit of leaf area index (canopy cover). Sufficient N is therefore essential during the early stages of beet growth to enable the leaf to acquire the 90-120 kg N/ha required.
Apart from the applied fertiliser, other sources of N are available to growing crops that need consideration, e.g.
- Residual N left in the soil by the previous crop or mineralised from soil organic matter during the autumn.
- If effluent has been applied.
- N mineralised from soil organic matter during the growth of the crop.
> Potassium
Potassium (K) is the element that allows plant tissues to regulate their water content and balance. This maintains the cellular rigidity required to drive the plant’s growth and control the photosynthetic activity of the leaf canopy. Two-thirds of total K is used by the leaf and one third is present in the bulb. Nitrogen fertilisers are used less efficiently when K is limiting.
> Sodium
Beet is one of the few crops that can tolerate sodium (Na) and can use it as an alternative to potassium in some situations or can be grown in saline soils. However, the two nutrients are not completely interchangeable. Soils that are low in both exchangeable K and Na respond to applied sodium. Very little of the applied sodium fertiliser is taken up when crops are adequately supplied with Potassium.
> Phosphorus (Phosphate)
Phosphorus (P) is essential in plants for a range of growth requirements. Phosphorus is distributed almost equally between the leaf and the bulb of a beet plant. Like many plants, P is crucial for early beet seedling development. Beet however does not have a high requirement of P for ongoing growth.
> Magnesium
Magnesium (Mg) is essential for photosynthesis and respiration base nutrients. Almost three quarters of total Mg is required by the beet’s leaf.
> Sulphur
Sulphur (S) is a structural component of the plant and is essential. The uptake of S by well grown beet crops is around 50 to 70kg S/ha and those of a high yielding beet crop closer to 100 kg S/ha.
> Boron
Is required for all root crops, and beet is no exception, typical rates are higher than other forage crops (e.g. forage brassicas).
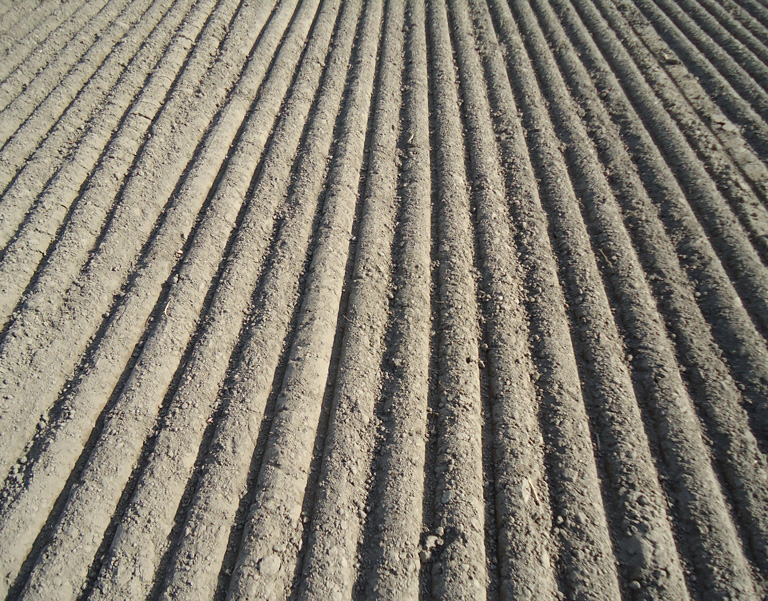
Final cultivations
A fine, firm and moist seedbed is essential for optimum plant emergence. Do not over cultivate or compact the seedbed.
The secondary cultivations are to create the seedbed. Aim for two passes for the seedbed with a maximum depth of 75mm. Use the ‘heel’ test to help determine firmness (this is when the indent of your heel can just be seen on the surface).
Cultivations should be ideally carried out using straight tine equipment to help avoid the risk of overworking. Powered cultivation equipment can cause an overly ‘fluffy’ seedbed or create pans and smearing of the soil in wet conditions.
Remove unnecessary weight from the tractor to help minimise compaction during the cultivation phase and utilise low tyre pressures.
Highlighting the ideal seedbed.
The seedbed should be fine and level while aiming for smaller particles at the surface and finer at depth. (image 4).
Correct paddock preparation is one of the most important steps to a high producing fodder beet crop. Weed control is vital for establishing beets and a poorly prepared seedbed will affect seedling emergence and therefore chemical timing.
It is crucial to monitor your paddock as conditions can change leading up to the sowing season. Remember, conditions are rarely uniform across an entire paddock, which is why thorough seedbed preparation is necessary to ensure seed is drilled into as even conditions as possible.
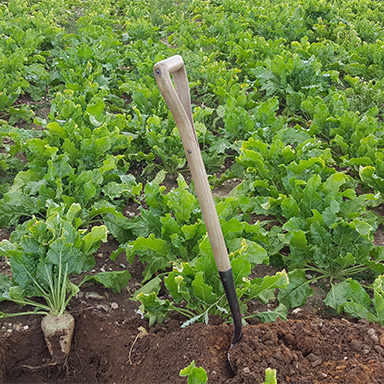
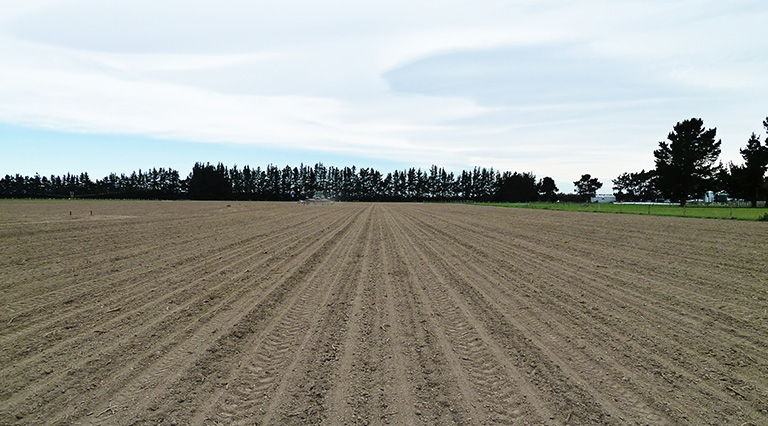
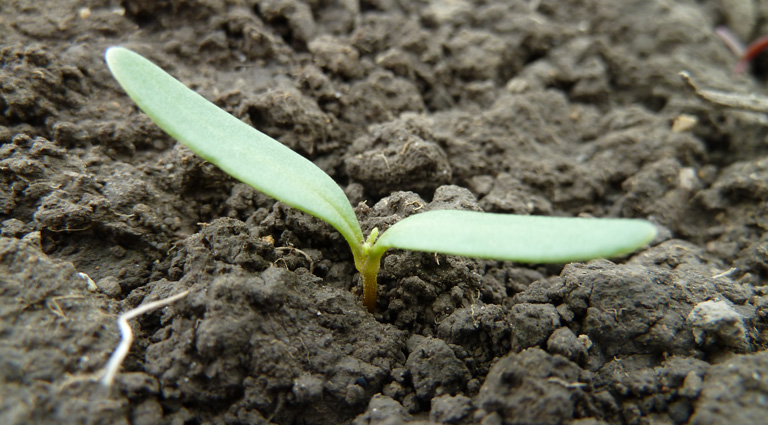
Paddock
planting
Use a precision planter and ensure speed is slow for optimum placement. Plant when conditions allow, and environmental risks considered and are minimised.
Precision plant the seed, plant at 20mm depth into moisture (no deeper than 25mm if losing moisture), at a maximum ground speed of 5-6kph. Any faster can cause the planter units to bounce, which can cause uneven depth of seeds and inaccurate spacing between them.
Plant as early as soil conditions allow, while considering risks such as current climate and risk of vernalisation (bolting). Timing of sowing will depend on climate and location (after the last frosts); generally, from late September to November will be the best window to sow (earlier timing generally in the North Island).
Adequate soil temperature is essential. A climbing soil temperature is required to help ensure even emergence. Aim for a history of at least 5 days of 10°C or higher before planting. Consider night time soil temperatures as well as day time as low night temperatures can greatly reduce the average.
Colder temperatures will cause additional stress on the emerging seedling, which is why it is best to avoid sowing too deep.
Planter row width spacing can vary, if you are planting for mechanical harvesting ensure the row spacing suits the harvester that will be utilised (typically 500mm).
Paddock
sowing rate
Plant the required sowing rate for the optimum established field emergence to suit the beet type germination and the end use of the crop.
Determine the optimum plant field establishment per hectare for the required end use:
- Consider the beet type and the line germination together with the conditions at planting.
The key benefit of an optimal plant population is the improved ground cover and leaf area index which leads to enhanced sunlight interception.
Factors affecting field establishment and plant population:
- The number of seeds sown.
- The seed lot germination %.
- Seedbed conditions have a significant effect on crop establishment.
- Soil capping or crusting can influence seedling emergence.
- Seedlings can be prone to pest and disease attack pre and post emergence.
- Seedlings can be at risk from weather conditions e.g. frost, high winds.
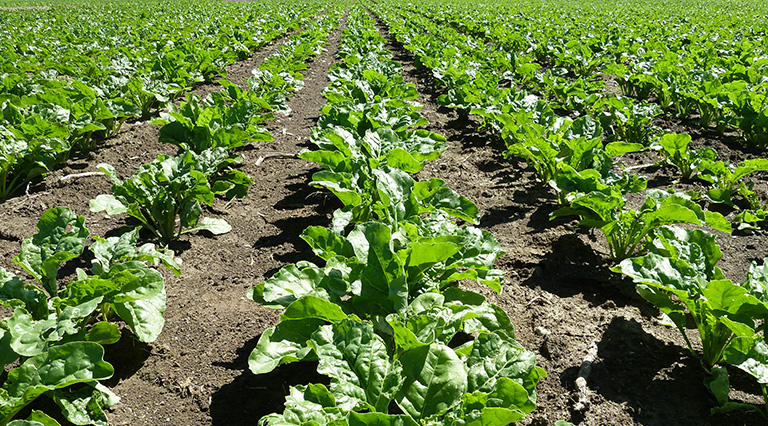
Full establishment is determined when plants are at the 6-leaf stage.
For in‐situ grazing:
- Aim for 80‐90,000 plants established = 8 plants m2 (typically 90‐100,000 seeds sown/ha).
For mechanical harvesting:
- Aim for 100,000 plants established = 10 plants m2 (typically 110‐120,000 seeds sown/ha).
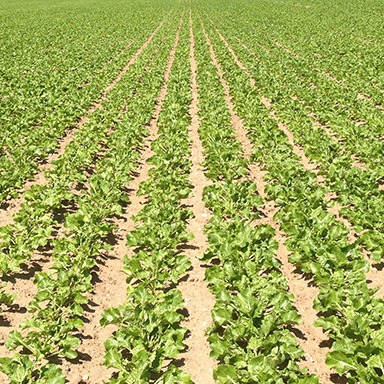
Ideal plant establishment example (mechanical harvesting beet sowing rate).
Highlighting plant numbers at canopy closure (mechanical harvesting beet sowing rate).
Beet specific
chemical applications
Pre-establishment
Apply post plant/pre-emergence herbicide and insecticide to ensure minimal weed competition and insect damage during beet germination.
After planting, apply post plant/pre-emergence herbicide (consider use of combining multiple active ingredients to help ensure maximum weed control while being safe on emerging seedlings following application). This is applied after the drilling but before plant emergence. Aim to apply as soon as possible post drilling. The chemical needs moisture to activate so if conditions are dry the chemical should be incorporated. Often an insecticide is applied at this stage to control insect pests which might attack emerging seedlings.
Post establishment
Correct application timing is crucial to help ensure weed and pest control and ensure crop growth is optimum.
Correct timing for any application is crucial, especially for any insects or pests. Target small weeds for maximum control. Applications should be customised to target specific weeds/pests and take into account label rates, conditions and utilise a fine spray (correct nozzles/water rate/boom height). Early emerging weeds that compete for light and moisture/nutrients are the key targets. Some chemicals can cause slower/stunted establishment in some cases. Use only if needed for specific weed types/uses. Addition of mineral oil to spray will help with adhesion/effectiveness. Avoid spraying in the heat of the day.
Beet seedlings are susceptible at emergence to a range of pests. The main threats to an establishing crop will be from slugs, springtails and nysius. Cutworms can be a threat in some areas where this pest is present. Second year lifecycle grass grub could also be an issue in any spring sown crop. Include an insecticide in the pre-crop knockdown spray to target any adult pests that may carry over or include with pre-emergence spray as stated above. Monitor vigorously for signs of damage post emergence. Be aware that many foliar insecticides can ‘strip’ the spray tank of the residual of what has been in the tank prior – ensure thorough tank decontamination techniques are followed prior to tank refill.
There can be incidences of plant damage that are out of your control; such as grass grub beetle attack and climatic conditions such as high winds. Monitor and seek advice if damage occurs.
Post establishment
fertiliser applications
The aim of post planting fertiliser is to minimise bare ground exposure (open rows) and ensure speed to canopy closure.
The development of leaf area is directly related to nutrition and temperature. The amount of nitrogen within the plant is an important factor. Other key nutrients during the rapid early growth phase are magnesium and sulphur, so it is important these are not limiting during plant development. Beet will achieve canopy cover quicker when conditions are warm and sunny.
Fully expanded cotyledon application
Apply nutrient requirements at key timings;
- Fully expanded cotyledon nitrogen application (timing avoids solid fertiliser settling in the crown of small plants and causing burn), will be one third of the crop’s applied nitrogen requirement. If the cotyledon stage timing is missed; then wait until the plant’s eight-leaf stage to apply to help reduce effects of plant burn from fertiliser settling in the crown. This may also include other nutrients dependent on base application timing. This application is to help optimise plant growth and leaf expansion and aim for ground cover (close rows) as quickly as possible to aid maximum light interception by the crop later in its development.
Close to canopy closure application
- A further nitrogen application will also be required close to canopy closure. This generally should be the final one third of the crop’s nitrogen requirements. The main aim is to drive canopy growth/health, but not oversupply the plants’ nitrogen requirements (especially late N, as this will rob the bulb of growth and accelerate top growth – canopy health/green leaf can be maintained by fungicide).
Post establishment
plant health
Maximise crop green leaf retention by use of registered fungicides. Appropriate timing is crucial for their success.
Use of registered fungicide is strongly recommended to help support the agronomy programme. Its use not only helps to prevent the development of specific disease but acts to support green leaf retention. Its growth regulator properties ensure adequate canopy health without excessive leaf growth which can rob the bulb of development.
Timing of fungicide should be at the outset of disease when early infection is first visible. Recommend two applications with timing between each of 3-4 weeks.
Adhere to grazing withholding periods when using registered fungicides, especially if considering early season utilisation of crop.


- Beet yellows virus is prevalent in many areas and is transmitted by aphids. This virus can cause major yield reductions if it is experienced before the 16-leaf stage. If the virus is experienced later in the canopy stage, its yield reduction potential is reduced (image 7). Beet specific fungicide will not control beet yellows virus and no seed treatments are currently registered for use in New Zealand. Appropriate timing of insecticide can aid in aphid control.
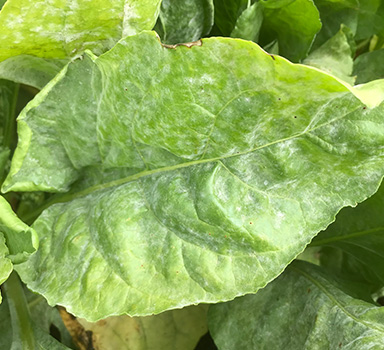
- Mildew (Powdery) can cause up to a 20% yield reduction and is most commonly experienced in dry environments (image 8).
- Rust can cause a 5-10% yield reduction and is most commonly experienced in moist/damp environments (image 9).
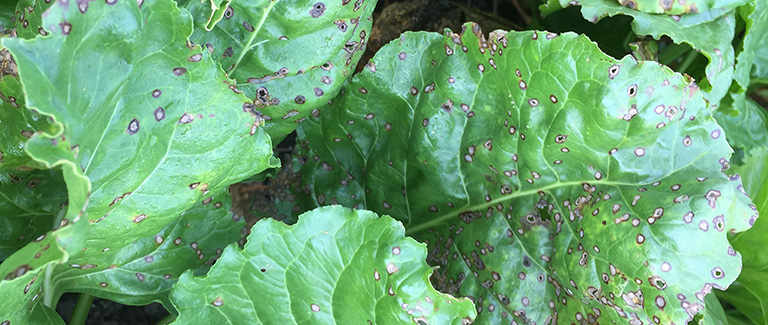
- Cercospora can cause significant yield reductions and is most commonly experienced in warm/humid environments. Multiple fungicide applications may be necessary for adequate control in certain circumstances (image 10).
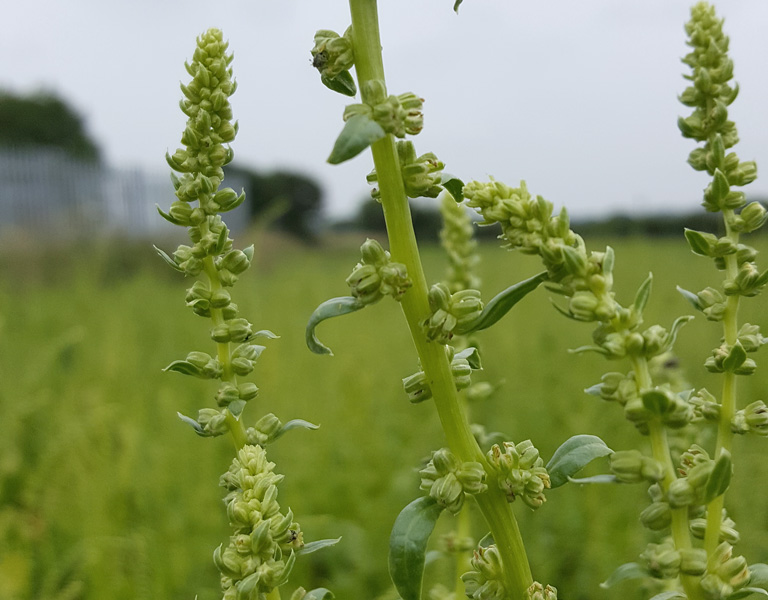
Manage
bolters
To help ensure the long-term success of beet, any bolters should be controlled.
In all countries where beets are grown, there will be a low percentage of plants that go generative (‘bolt’), as the species ‘Beta vulgaris’ is susceptible to this. The occurrence of bolters is not only dependent on the variety; various influences can cause this. There can be a genetic tendency for bolters. Varieties/seed type differ in their bolter percentage.
If there are any bolters in the crop, these should be managed by either breaking the stem before flowering or removing the plant from the field after flowering. If left uncontrolled, these plants can greatly impact the subsequent crop rotation for that paddock by dramatically increasing the number of years before the paddock can be potentially returned to beet.
- One weed beet or bolter plant per m² can reduce crop yields by 11%. This is from shading and increased competition for moisture and nutrients (similar to large weeds).
- Weed beet/bolters host undesirable pests and diseases such as beet cyst nematode (BCN), rhizomania and downy mildew.
- An average of 1,500 viable weed beet seeds are produced per weed beet plant. > If seed is ploughed in it becomes dormant and can remain viable in the soil for more than 20 years. > Increasing the beet rotation can reduce the numbers of weed beet present in successive beet crops.
- If seed is ploughed in it becomes dormant and can remain viable in the soil for more than 20 years.
- Increasing the beet rotation can reduce the numbers of weed beet present in successive beet crops.
Main points
summary
Understand the beet types
- Environment, animal and end use should all be considerations when planning for your beet crop. This will help determine the beet type and crop area required.
Paddock planning
- Select paddocks that will be suitable for beet with known history, optimum nutrient availability and can be prepared to an acceptable standard.
Paddock preparation
- Two thirds of the total crop yield will be determined by the activities carried out before seedling emergence.
- Ensure there are no sub soil restrictions that could obstruct plant root development.
- An adequate fallow period allows moisture build up and an early weed strike.
- A rapidly growing canopy with good ground cover can exploit sunshine hours to help drive yield.
- Ensure key nutrients are not limiting for optimum plant emergence and subsequent growth.
- A fine, firm and moist seedbed is essential for optimum plant emergence. Do not over cultivate or compact the seedbed.
Paddock planting
- Use a precision planter and ensure speed is slow for optimum placement. Plant when conditions allow, and environmental risks considered and are minimised.
Paddock sowing rate
- Plant the required sowing rate for the optimum established field emergence to suit the beet type germination and the end use of the crop.
Beet specific chemical applications
- Apply post plant/pre-emergence herbicide and insecticide to ensure minimal weed competition and insect damage during beet germination.
- Correct application timing is crucial to help ensure weed and pest control and ensure crop growth is optimum.
Post establishment fertiliser applications
- The aim of post planting fertiliser is to minimise bare ground exposure (open rows) and ensure speed to canopy closure.
Post establishment plant health
- Maximise crop green leaf retention by use of registered fungicides. Appropriate timing is crucial for their success.
Manage bolters
- To help ensure the long-term success of beet, any bolters should be controlled.